Neither Google maps nor location services are available in the core Flutter framework. But as with many other features not available in Flutter there is plugins for it.
For Google maps we have google_maps_flutter which is a first part plugin made by the same developer team that manages the Flutter core framework.
For geolocation there are several plugins. I have tried the two most popular geolocator and location. My personal favorite is geolocator as it provide a few more features and a bit more fine tuning.
Install Google maps and geolocator plugins for Flutter
So lets use the google_maps_flutter and geolocator plugins. To install the plugins follow the steps below:
1. Add the dependencies to your pubspec.yaml
dependencies:
  flutter:
    sdk: flutter

  google_maps_flutter: ^2.0.1
  geolocator: ^7.0.1
2. Download plugins to your Flutter project
In your project root enter the command below and it will fetch all needed files. Editors like Android Studio have a buttons for Pub get, Pub upgrade Flutter doctor etc. which you can use if you do not want to engage the terminal for some reason.
flutter pub get3. Add permissions for iOS and Android
3a. Add permission to Android
<manifest>
  <uses-permission android:name="android.permission.ACCESS_FINE_LOCATION" />
</manifest>
If you target Android 10+ and want the geolocator plugin to work in background mode use the code below instead
<manifest>
   <!-- Required only when requesting background location access on
       Android 10 (API level 29) and higher. -->
     <uses-permission android:name="android.permission.ACCESS_BACKGROUND_LOCATION" />
</manifest>
3b. Add permission to iOS
<key>NSLocationWhenInUseUsageDescription</key>
<string>This app needs access to location when open.</string>
<key>NSLocationAlwaysUsageDescription</key>
<string>This app needs access to location when in the background.</string>
Implementing geolocation in your Flutter App
Now we are ready to start using the plugins and do something with them. I was thinking we could make an app that updates your location whenever it changes and draws the location on a zoomed in map.
To get our location continuously or every time it changes we can use a stream with geolocator. geolocator has a static method for this so all you have to do is to put Geolocator.getPositionStream().listen((position) {}); inside your Widget’s initState() method like this:
class _MyHomePageState extends State<MyHomePage> {
// Save position we get from the Geolocator stream in this variable
Position _position;
@override
void initState() {
super.initState();
// Use this static method to start listening to a stream with position updates
Geolocator.getPositionStream(
desiredAccuracy: LocationAccuracy.best,
distanceFilter: 0,
forceAndroidLocationManager: false,
intervalDuration: Duration(milliseconds: 1000),
).listen((position) {
setState(() {
_position = position;
});
});
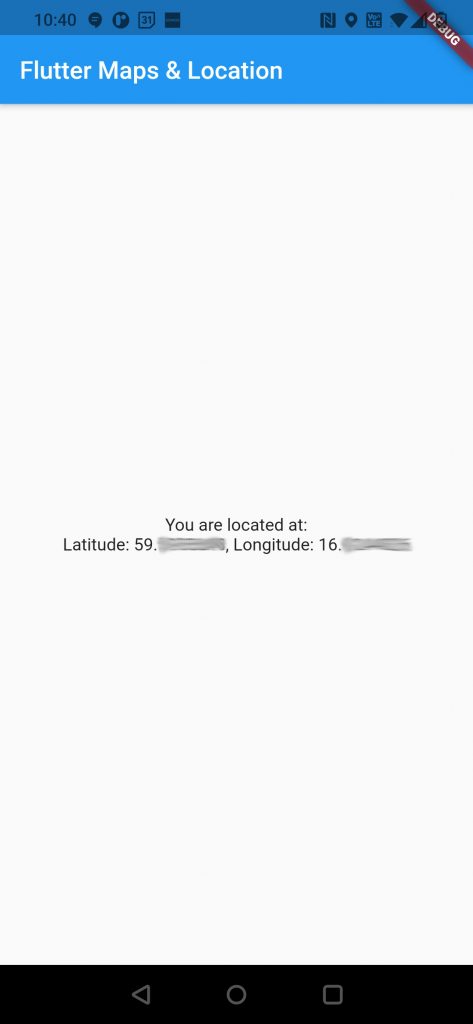
}We have a private variable to hold the Position and each time we get a new position on the stream we update this variable through a setState() call. This way we can use the _position variable in our UI and it will always show the latest position we got on the stream. This simple app will look like this:
You can try it yourself, here is the full source code
import 'package:flutter/material.dart';
import 'package:geolocator/geolocator.dart';

void main() {
  runApp(MyApp());
}

class MyApp extends StatelessWidget {
  @override
  Widget build(BuildContext context) {
    return MaterialApp(
      title: 'Flutter Demo',
      theme: ThemeData(
        primarySwatch: Colors.blue,
      ),
      home: MyHomePage(title: 'Flutter Maps & Location'),
    );
  }
}

class MyHomePage extends StatefulWidget {

  MyHomePage({Key key, this.title}) : super(key: key);

  final String title;

  @override
  _MyHomePageState createState() => _MyHomePageState();

}

class _MyHomePageState extends State<MyHomePage> {

  // Save position we get from the Geolocator stream in this variable
  Position _position;

  @override
  void initState() {
    super.initState();

    // Use this static method to start listening to a stream with position updates
    Geolocator.getPositionStream(
      desiredAccuracy: LocationAccuracy.best,
      distanceFilter: 0,
      forceAndroidLocationManager: false,
      intervalDuration: Duration(milliseconds: 1000),
    ).listen((position) {
      setState(() {
        _position = position;
      });
    });
  }

  @override
  Widget build(BuildContext context) {
    return Scaffold(
      appBar: AppBar(
        title: Text(widget.title),
      ),
      body: Center(
        child: Column(
          mainAxisAlignment: MainAxisAlignment.center,
          children: <Widget>[
            Text(
              'You are located at:',
            ),
            Text(
              '$_position',
            ),
          ],
        ),
      ),
    );
  }
}
Implementing Google Maps in your Flutter App
Now, lets add Google maps to the app. We already installed the plugin so we can start implementing maps and map controllers. Oh wait, no we can’t… We need an API key from google and we also need to enable the SDK for each platform, in this case Android and iOS.
I won’t go into detail on how to do this as it would bloat this article way too much. instead I will point you to this guide: Getting started with Google Maps Platform which is the best and most comprehensive guide I read on the subject.
Now that we have an API key and is up and running we will replace the body widget that showed the location with a GoogleMap widget.
@override
Widget build(BuildContext context) {
  return Scaffold(
    appBar: AppBar(
      title: Text(widget.title),
    ),
    body: _position == null
        ? Text('Waiting for location . .')
        : GoogleMap(
            mapType: MapType.hybrid,
            markers: Set<Marker>.of(markers.values),
            initialCameraPosition: CameraPosition(
              target: LatLng(_position.latitude, _position.longitude),
              zoom: 14.4746,
            ),
            onMapCreated: (GoogleMapController controller) {
              _mapController = controller;
            },
          ),
  );
}
This will show a hybrid map of our current location, which we get from the stream and store in _position. If this is the first render _position might still be null since it set asynchronously, in this case we simply show a Text container with a loading message instead.
Of note is also the onMapCreated callback which will let us save an instance of GoogleMapController which we can use later to control the map in different ways, more on this and markers later.
We need to make a few changes to initState()
@override
void initState() {
  super.initState();
  _position = null;
  getInitialPosition();
  // Use this static method to start listening to a stream with position updates
  Geolocator.getPositionStream(
    desiredAccuracy: LocationAccuracy.best,
    distanceFilter: 0,
    forceAndroidLocationManager: false,
    intervalDuration: Duration(milliseconds: 1000),
  ).listen((position) {
    if (_mapController != null) {
      _mapController.animateCamera(
          CameraUpdate.newCameraPosition(CameraPosition(zoom: 12.4746, target: LatLng(position.latitude, position.longitude))));
    }
    setState(() {
      _position = position;
    });
  });
}
We make so that for each position received from the stream is used to center the map on our current location and we do this with the GoogleMapController we saved in the onMapCreated callback. I also added a call to a new method getInitialPosition()
Future<void> getInitialPosition() async {
_initialPosition = await Geolocator.getCurrentPosition();
_addMarker("You", _initialPosition);
}
void _addMarker(var id, Position pos) {
final MarkerId markerId = MarkerId(id);
// creating a new MARKER
final Marker marker = Marker(
markerId: markerId,
position: LatLng(pos.latitude, pos.longitude),
infoWindow: InfoWindow(title: id, snippet: '*'),
onTap: () {
_onMarkerTapped(markerId);
},
);
setState(() {
// adding a new marker to map
markers[markerId] = marker;
});
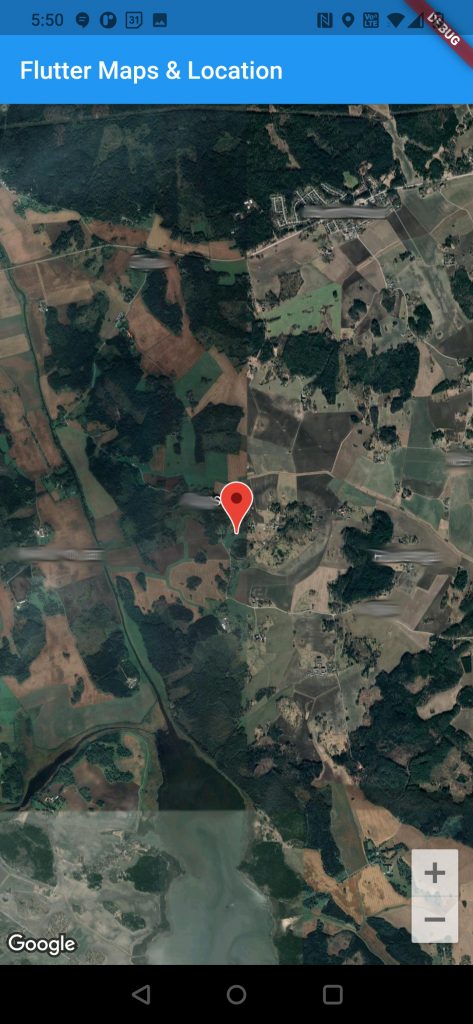
}This is a small async method which only adds a marker of your initial position. If you want the marker to instead always show your current position you could simply update marker.position in the Geolocator.getPositionStream.
This is what the app looks like now.
Full source code below.
import 'dart:async';

import 'package:flutter/material.dart';
import 'package:geolocator/geolocator.dart';
import 'package:google_maps_flutter/google_maps_flutter.dart';

void main() {
  runApp(MyApp());
}

class MyApp extends StatelessWidget {
  @override
  Widget build(BuildContext context) {
    return MaterialApp(
      title: 'Flutter Demo',
      theme: ThemeData(
        primarySwatch: Colors.blue,
      ),
      home: MyHomePage(title: 'Flutter Maps & Location'),
    );
  }
}

class MyHomePage extends StatefulWidget {
  MyHomePage({Key key, this.title}) : super(key: key);

  final String title;

  @override
  _MyHomePageState createState() => _MyHomePageState();
}

class _MyHomePageState extends State<MyHomePage> {
  // Save position we get from the Geolocator stream in this variable
  Position _position;
  Position _initialPosition;

  // Completer<GoogleMapController> _mapControllerCompleter = Completer();
  Map<MarkerId, Marker> markers = <MarkerId, Marker>{};
  GoogleMapController _mapController;

  @override
  void initState() {
    super.initState();
    _position = null;
    getInitialPosition();
    // Use this static method to start listening to a stream with position updates
    Geolocator.getPositionStream(
      desiredAccuracy: LocationAccuracy.best,
      distanceFilter: 0,
      forceAndroidLocationManager: false,
      intervalDuration: Duration(milliseconds: 1000),
    ).listen((position) {
      if (_mapController != null) {
        _mapController.animateCamera(
            CameraUpdate.newCameraPosition(CameraPosition(zoom: 14, target: LatLng(position.latitude, position.longitude))));
      }
      setState(() {
        _position = position;
      });
    });
  }

  Future<void> getInitialPosition() async {
    _initialPosition = await Geolocator.getCurrentPosition();
    _addMarker("You", _initialPosition);
  }

  void _addMarker(var id, Position pos) {
    final MarkerId markerId = MarkerId(id);

    // creating a new MARKER
    final Marker marker = Marker(
      markerId: markerId,
      position: LatLng(pos.latitude, pos.longitude),
      infoWindow: InfoWindow(title: id, snippet: '*'),
      onTap: () {
        _onMarkerTapped(markerId);
      },
    );

    setState(() {
      // adding a new marker to map
      markers[markerId] = marker;
    });
  }

  @override
  Widget build(BuildContext context) {
    return Scaffold(
      appBar: AppBar(
        title: Text(widget.title),
      ),
      body: _position == null
          ? Text('Waiting for location . .')
          : GoogleMap(
              mapType: MapType.hybrid,
              markers: Set<Marker>.of(markers.values),
              initialCameraPosition: CameraPosition(
                target: LatLng(_position.latitude, _position.longitude),
                zoom: 14,
              ),
              onMapCreated: (GoogleMapController controller) {
                _mapController = controller;
              },
            ),
    );
  }

  void _onMarkerTapped(MarkerId id) {}
}
Adding custom markers and drawing on maps
Tomorrow I am going to extend this app with custom markers made from image assets and also use CustomPaint to draw a HUD for Google Maps with Flutter.